E99 Drone Pro Manual PDF: A Comprehensive Guide (Updated 12/05/2025)
Welcome to the instruction manual for your newly purchased E99 Drone Pro! This comprehensive guide aims to help you become a proficient user, providing detailed instructions․
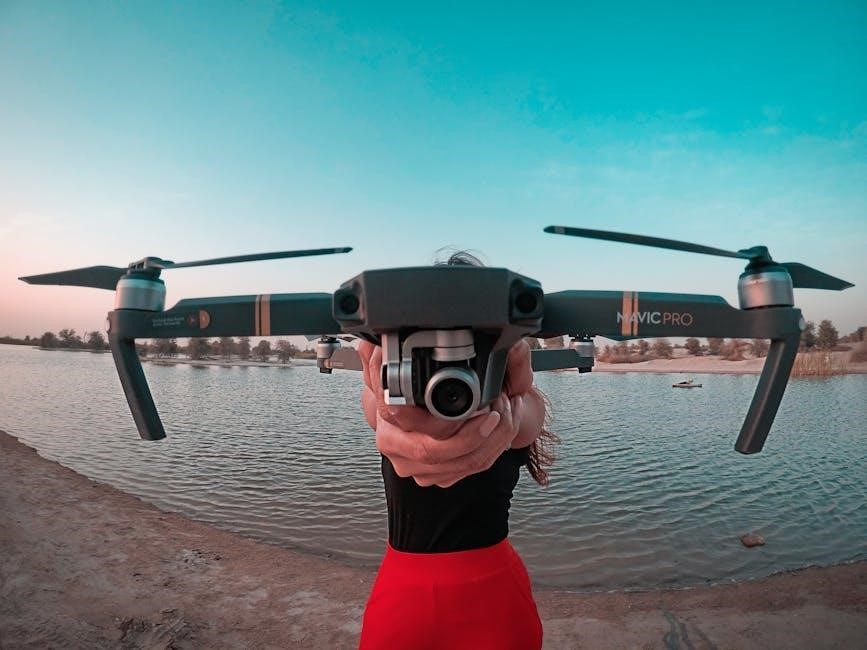
Congratulations on acquiring the E99 Drone Pro! This cutting-edge drone is engineered for both beginners and experienced pilots, offering a fantastic blend of user-friendliness and advanced features․ This manual serves as your primary resource for understanding every aspect of your new drone, from initial setup and safe operation to exploring its diverse functionalities․
The E99 Pro boasts a high-quality camera, intelligent flight modes, and a reliable return-to-home function, ensuring stunning aerial photography and worry-free flights․ We’ve designed this guide to be clear, concise, and easy to follow, empowering you to maximize your flying experience․ Before your first flight, carefully review the safety precautions and warnings detailed within this manual to ensure a safe and enjoyable experience․
What’s Included in the Box
Upon opening your E99 Drone Pro package, please verify that all the following components are present․ This ensures you have everything needed for a successful setup and flight․ You should find: 1 x E99 Drone Pro aircraft, 1 x Remote Controller, 1 x Drone Battery, 4 x Propellers (2 clockwise, 2 counter-clockwise), 1 x USB Charging Cable, 4 x Propeller Guards, and 1 x Screwdriver for propeller installation․
Additionally, the box contains this comprehensive User Manual, providing detailed instructions and safety guidelines․ Please retain all packaging for potential future use, such as warranty claims or transportation․ If any items are missing or damaged, immediately contact our customer support team for assistance․ Careful inventory is crucial before your first flight!
Safety Precautions & Warnings
Prior to operating your E99 Drone Pro, carefully review these crucial safety precautions․ Always fly within visual line of sight and adhere to local regulations regarding drone operation․ Never fly near airports, crowds, or restricted airspace․ Inspect the drone and propellers for damage before each flight; do not fly with damaged components․
Be mindful of weather conditions – avoid flying in rain, strong winds, or extreme temperatures․ Keep the drone away from power lines, trees, and water bodies․ Ensure the battery is fully charged and properly installed․ This drone contains propellers that can cause injury; maintain a safe distance during operation․ Responsible flying ensures both your safety and the safety of others․
Getting Started with Your E99 Pro

Prepare for flight by charging the drone and remote, installing propellers, and understanding the power-on sequence for optimal performance․
Charging the Drone Battery
Proper battery charging is crucial for maximizing flight time and ensuring the longevity of your E99 Pro’s power source․ Locate the charging port on the drone’s battery․ Connect the provided USB charging cable to the port and a suitable USB power adapter (5V/2A recommended, not included)․
The LED indicator on the battery will illuminate, typically displaying red during charging and turning green once fully charged․ A full charge typically takes between 1․5 to 2․5 hours, but this can vary․ Avoid overcharging the battery, as it can damage the cells․ Disconnect the battery immediately upon reaching a full charge․ Always use the designated charging cable and adapter to prevent damage or safety hazards․ Regularly check the battery for any signs of swelling or damage before each charge․
Charging the Remote Controller
Ensuring your remote controller is adequately charged is vital for uninterrupted flight control of your E99 Pro drone․ Locate the charging port, typically a USB-C or Micro-USB port, on the controller․ Connect the provided charging cable to this port and plug the other end into a USB power source (5V/1A recommended)․
The controller will usually feature LED indicators to display the charging status – often red while charging and turning off or changing to green when fully charged․ A full charge generally takes around 2-3 hours․ Do not use fast chargers, as they may damage the controller’s internal circuitry․ Always disconnect the controller once fully charged to preserve battery health․ Regularly inspect the charging port for debris or damage․
Installing the Propellers
Correct propeller installation is crucial for safe and stable flight with your E99 Pro drone․ The propellers are typically marked with letters or colors to indicate their correct position on the drone’s arms․ Always refer to the diagram in this manual for precise placement․
Each propeller has a specific rotation direction․ Align the propeller with the corresponding motor shaft and gently press down, rotating it to lock it into place․ Ensure the propellers are securely fastened before each flight; loose propellers can cause instability or crashes․ Inspect propellers for any damage before installation, replacing any cracked or bent blades immediately․
Powering On/Off the Drone & Controller
To power on the drone, locate the power button, typically found on the underside of the aircraft․ Press and hold the button until the LED indicators illuminate․ The controller is powered on similarly, with a dedicated power button․ Ensure both the drone and controller are fully charged before attempting to fly․
For a normal shutdown, press and hold the power button on both the drone and controller until the lights turn off․ Avoid abruptly cutting power during flight, as this could lead to loss of control․ Always land the drone safely before powering it down․ Proper shutdown preserves battery life and prevents potential damage to the drone’s internal systems․
Understanding the Drone’s Features
Explore the E99 Pro’s capabilities, including its camera, flight modes, intelligent features, and the crucial Return-to-Home functionality for safe operation․
Camera Specifications & Resolution
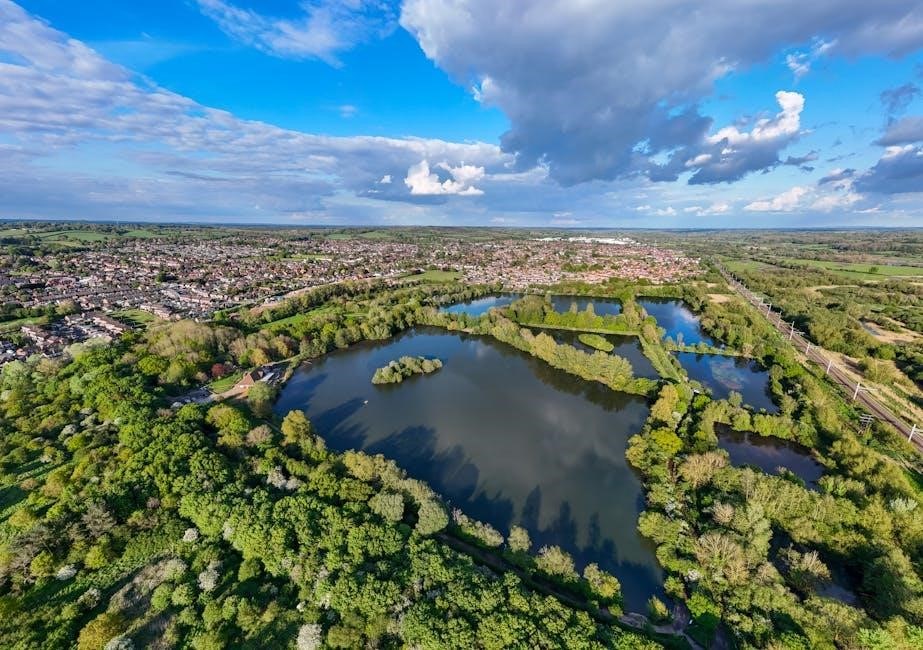
The E99 Pro boasts a high-definition camera designed to capture stunning aerial footage and photographs․ Typically, this drone features a camera with a resolution of 4K Ultra HD, allowing for crisp, detailed images and videos․ The camera sensor size is crucial; a larger sensor generally performs better in low-light conditions, resulting in clearer pictures․
Video recording capabilities usually extend to frame rates of 30 or 60 frames per second, providing smooth motion in your recordings․ The camera also incorporates electronic image stabilization (EIS) to minimize vibrations and ensure stable footage, even in windy conditions․ Adjustable camera angles are often available, allowing for versatile shooting perspectives․ The camera supports various photo formats, including JPEG and RAW, offering flexibility in post-processing․ Understanding these specifications will help you maximize the camera’s potential․
Flight Modes (GPS, Altitude Hold, Headless)
The E99 Pro offers several intelligent flight modes to enhance your flying experience and simplify operation․ GPS Mode utilizes satellite signals for precise positioning, enabling features like Return-to-Home and stable hovering․ Altitude Hold automatically maintains a consistent altitude, making it easier to capture smooth footage and focus on directional control․
Headless Mode, also known as “no direction” mode, disregards the drone’s nose orientation, allowing for intuitive control regardless of which way the drone is facing․ This is particularly useful for beginners․ These modes significantly improve flight stability and safety, especially in challenging environments․ Familiarizing yourself with each mode will unlock the full potential of your E99 Pro, providing a more enjoyable and controlled flying experience․
Intelligent Flight Features (Follow Me, Orbit Mode)
The E99 Pro boasts impressive intelligent flight features designed to automate complex maneuvers and capture stunning aerial footage․ Follow Me Mode allows the drone to autonomously track a selected subject – typically the remote controller operator – maintaining a consistent distance and framing․ This is ideal for hands-free filming during activities․
Orbit Mode enables the drone to circle a designated point of interest, creating dynamic and cinematic shots․ Users can adjust the orbit radius and speed via the mobile app․ These features simplify professional-looking aerial photography and videography, requiring minimal piloting skill․ Ensure a strong GPS signal for optimal performance of these intelligent modes, enhancing your creative possibilities․
Return-to-Home (RTH) Function
The Return-to-Home (RTH) function is a crucial safety feature of the E99 Pro, automatically piloting the drone back to its takeoff point․ RTH can be activated manually through the remote controller or will automatically engage under specific conditions, such as low battery levels or signal loss․
Prior to flight, ensure the home point is accurately set – typically achieved through a successful GPS lock․ The drone ascends to a pre-set altitude (adjustable in the app) before returning, avoiding obstacles․ Always maintain visual line of sight, even during RTH․ Understanding and utilizing this feature significantly enhances flight safety and protects your investment․ Regularly check RTH settings before each flight․
Using the E99 Pro App
Unlock the full potential of your drone with the dedicated app, offering control, camera adjustments, and intelligent flight features for enhanced experiences․
Downloading & Installing the App
To begin utilizing the advanced features of your E99 Pro drone, the first step is downloading and installing the dedicated mobile application․ This app serves as the central hub for controlling your drone, accessing real-time camera feeds, and managing flight settings․ You can typically find the app by searching for “E99 Pro” on both the Apple App Store (for iOS devices) and the Google Play Store (for Android devices)․
Ensure you are downloading the official app developed by the manufacturer to avoid potential security risks or compatibility issues․ Once located, tap the “Install” button and allow the app to download and install on your smartphone or tablet․ The installation process may take a few minutes, depending on your internet connection speed․ After installation is complete, locate the app icon on your home screen and tap it to launch the application․ You are now ready to connect your drone and begin exploring its capabilities!
Connecting the Drone to the App
After launching the E99 Pro app, you’ll need to establish a connection between your drone and your mobile device․ First, power on your drone and ensure it’s in pairing mode – typically indicated by a flashing light on the drone itself․ Within the app, navigate to the “Connect Drone” or similar option, usually found on the main screen․
The app will then begin searching for available drones․ Select your E99 Pro from the list of detected devices․ You may be prompted to enter your Wi-Fi password to allow the drone to connect to your network for data transmission․ Once connected, the app will display a live video feed from the drone’s camera, confirming a successful connection․ A stable connection is crucial for safe and reliable flight operations․
App Interface Overview
The E99 Pro app features a user-friendly interface designed for intuitive control and monitoring․ The main screen prominently displays a live video feed from the drone’s camera, alongside essential flight information like altitude, distance, and battery level․ Below the video feed, you’ll find virtual controls for takeoff, landing, and basic flight maneuvers․
A settings icon (often a gear symbol) grants access to camera adjustments, flight mode selection, and drone settings․ A map view displays the drone’s current location and allows for waypoint planning․ The app also includes a media gallery for reviewing captured photos and videos․ Familiarizing yourself with these elements will greatly enhance your flying experience and unlock the full potential of your E99 Pro․
Adjusting Camera Settings via the App
Within the E99 Pro app, accessing the camera settings allows for precise control over your aerial photography and videography․ You can adjust the photo resolution, choosing between various options for optimal image quality and storage space․ Video resolution settings similarly offer choices, impacting file size and clarity․
Exposure compensation lets you brighten or darken the image, while ISO settings control the camera’s sensitivity to light․ White balance adjustments ensure accurate color representation․ Furthermore, you can activate features like grid lines for composition and enable HDR for enhanced dynamic range․ Experimenting with these settings will help you capture stunning aerial content tailored to your preferences․
Flight Controls & Operation
Mastering the remote controller and understanding basic maneuvers are crucial for safe and enjoyable flights with your E99 Pro drone, ensuring optimal control;
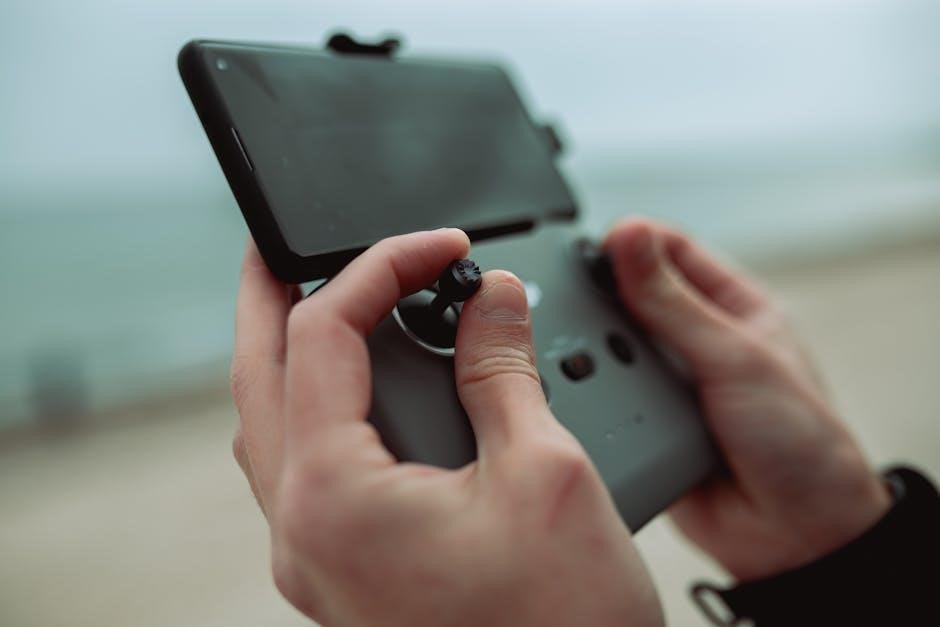
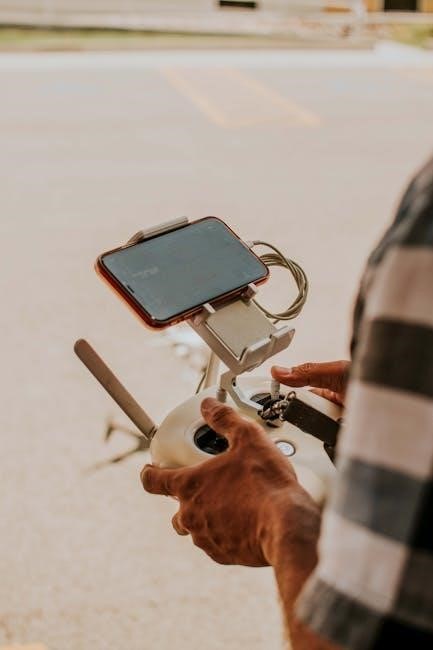
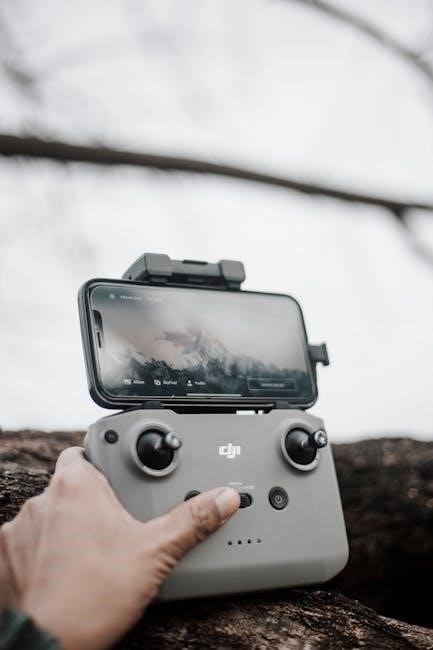
Understanding the Remote Controller
The E99 Pro’s remote controller is your primary interface for piloting the drone, featuring intuitive controls for a seamless flying experience․ Familiarize yourself with the placement of each control stick; the left stick manages throttle and rotation, while the right stick governs forward/backward movement and lateral direction․
Several buttons offer additional functionality: the one-key takeoff/landing button simplifies operation, while the speed mode switch allows you to adjust the drone’s responsiveness․ The return-to-home (RTH) button initiates the automated return function․ Pay close attention to the LED indicators displaying battery levels and signal strength․ Understanding these elements will greatly enhance your control and confidence during flight, ensuring a safe and enjoyable experience with your E99 Pro․
Basic Flight Maneuvers (Takeoff, Landing, Forward, Backward)
Mastering basic maneuvers is crucial for confident E99 Pro operation․ To take off, ensure a clear area and gently push both control sticks down and inwards (or use the one-key takeoff button)․ For forward flight, push the right stick forward; pull back to fly backward․
Control the ascent and descent using the left stick – up to ascend, down to descend․ Landing is achieved by slowly lowering the drone with the left stick or utilizing the one-key landing feature․ Practice these movements in an open space, starting with short distances, to build muscle memory and refine your control․ Remember to maintain visual contact with the drone at all times during these initial flights․
Turning & Sideways Flight

Achieving precise turns and sideways movement expands your E99 Pro’s flight capabilities․ To turn the drone, gently move the right stick left or right․ A slight movement results in a gradual turn, while a larger movement creates a sharper turn․ For sideways flight (strafing), move the right stick directly left or right while maintaining the forward/backward position․
Coordinate these movements with the left stick for altitude control during turns and strafing․ Practice smooth, controlled inputs to avoid abrupt movements․ Mastering these techniques allows for creative filming angles and navigating complex environments․ Always prioritize safety and maintain visual line of sight during these maneuvers․
Adjusting Flight Speed & Sensitivity
Fine-tuning flight speed and sensitivity is crucial for a tailored flying experience with your E99 Pro․ Access these settings through the dedicated app interface․ Typically, a slider control allows you to select between beginner, normal, and sport modes, each offering increasing speed and responsiveness․
Beginner mode is ideal for new pilots, providing reduced speed and dampened controls․ Sport mode unlocks the drone’s full potential, but requires greater skill․ Sensitivity adjustments impact how quickly the drone reacts to stick inputs․ Lower sensitivity offers more stability, while higher sensitivity enables agile maneuvers․ Experiment to find settings that suit your flying style and conditions․
Troubleshooting Common Issues
Encountering problems? This section provides solutions for frequent issues like connection failures, camera malfunctions, limited flight time, and unexpected drifting․
Drone Won’t Connect to Controller
If your E99 Pro drone fails to connect to the remote controller, several factors could be at play․ First, ensure both the drone and controller are fully charged and powered on correctly․ Verify that the controller is in pairing mode – typically achieved by pressing and holding the power button until the indicator light flashes․
Confirm that no other devices are attempting to connect to the controller, as interference can occur․ Restart both the drone and controller; a simple reboot often resolves connectivity issues․ Check for firmware updates for both devices via the app, as outdated software can cause compatibility problems․ Finally, ensure you are within a reasonable range (typically within 30-50 feet) during the initial pairing process․
Camera Not Working
If the camera on your E99 Pro drone isn’t functioning, begin by verifying the camera lens is clean and free of obstructions; Ensure the camera is properly mounted and securely connected to the drone’s gimbal system․ Within the E99 Pro app, check the camera settings to confirm it’s enabled and set to your desired resolution and recording format․
Restart the drone and the app to refresh the connection․ Inspect the SD card (if applicable) to ensure it’s correctly inserted, has sufficient storage space, and isn’t corrupted․ Check for firmware updates for both the drone and the camera module via the app․ If issues persist, try resetting the camera to its factory defaults through the app’s settings menu․
Short Flight Time
Experiencing a shorter-than-expected flight time with your E99 Pro? First, confirm the battery is fully charged before each flight․ Avoid flying in strong winds or extreme temperatures, as these conditions significantly drain the battery․ Minimize aggressive maneuvers like rapid acceleration and steep climbs, which consume more power․
Check the propellers for damage; damaged propellers require more energy to maintain lift․ Ensure no unnecessary apps are running in the background on your connected smartphone, as they can impact drone performance․ Calibrate the battery within the E99 Pro app for accurate readings․ If the problem continues, consider a battery replacement, as battery capacity degrades over time․
Drone Drifting During Flight
Is your E99 Pro drifting unexpectedly during flight? Begin by calibrating the drone’s IMU (Inertial Measurement Unit) within the app; this is crucial for stable flight․ Ensure you are flying in an open area, away from magnetic interference like power lines or metal structures․ Check the propellers for any damage or imbalance – replace if necessary․
Verify the GPS signal strength; a weak signal can cause drifting․ Confirm the drone is level before takeoff․ Adjust the trim settings on the remote controller to counteract any consistent drift․ If drifting persists, update the drone’s firmware to the latest version․ A recalibration after firmware updates is also recommended for optimal performance․
Maintenance & Care
Regular maintenance ensures optimal performance and longevity of your E99 Pro․ Consistent cleaning, proper storage, and timely part replacements are essential practices․
Cleaning the Drone
Maintaining cleanliness is crucial for the E99 Pro’s performance and lifespan․ After each flight, inspect the drone for dirt, dust, and debris, especially on the propellers, motors, and camera lens․ Use a soft, dry cloth to gently wipe down the exterior surfaces․
For stubborn dirt, slightly dampen the cloth with water – never spray liquids directly onto the drone․ Pay close attention to the ventilation openings, ensuring they are free from obstructions․ Clean the camera lens with a specialized lens cleaning cloth to avoid scratches and maintain image quality․ Avoid using harsh chemicals or abrasive cleaners, as these can damage the drone’s components․ Regular cleaning prevents buildup that can affect flight stability and overall functionality․
Propeller Replacement
Replacing propellers is sometimes necessary due to damage or wear․ Always power off the drone and remove the battery before attempting a replacement․ Identify the correct propeller – the E99 Pro uses specific propellers marked with either ‘A’ or ‘B’․ Ensure you match the replacement to the corresponding motor arm․
Use the included screwdriver to loosen the screw securing the damaged propeller․ Remove the old propeller and carefully install the new one, tightening the screw firmly but not excessively․ Always replace propellers in pairs to maintain balanced flight characteristics․ Regularly inspect propellers for cracks or bends, and replace them promptly to prevent accidents and ensure optimal performance․
Battery Storage & Maintenance
Proper battery care significantly extends its lifespan and ensures safe operation․ When storing the battery for extended periods, discharge it to approximately 40-60% capacity․ Avoid storing a fully charged or completely depleted battery․ Store the battery in a cool, dry place, away from direct sunlight and extreme temperatures․
Never leave the battery unattended while charging․ Use only the provided charger to avoid damage or fire hazards․ Regularly inspect the battery for any signs of swelling, leakage, or damage․ If any abnormalities are detected, discontinue use immediately․ Avoid dropping or subjecting the battery to physical shock․ Following these guidelines will maximize battery performance and longevity․
Firmware Updates & How to Install
Regular firmware updates are crucial for optimal drone performance, stability, and access to new features․ Check the official E99 Drone Pro website or the dedicated app for available updates․ Download the latest firmware file to your smartphone or computer․ Ensure the drone battery is sufficiently charged (above 50%) before initiating the update process․
Connect the drone to the app via Wi-Fi and follow the on-screen prompts to begin the firmware installation․ Do not interrupt the update process, as this could potentially damage the drone’s system․ Once completed, the drone will automatically restart․ Verify the successful update within the app settings․